Most product demos fail before the first ten seconds are over. Not because the product is bad, but because the recording starts too slow, shows too much, or never gives the viewer a reason to keep watching.
Recording a good product demo is not about having the best camera or the fanciest screen recorder. It is about knowing what your viewer needs to see, keeping that tight, and getting out before their attention does.
This guide covers everything: the difference between a live demo and a recorded one, what to prepare before you hit record, how to actually record it well, and how to turn raw demo footage into short-form ad content that performs on TikTok, Instagram, and YouTube.
Table of Contents
- Live demo vs. recorded demo: which one you need
- What to decide before you record anything
- How to set up your recording environment
- How to record a product demo, step by step
- What makes a demo video worth watching
- How to turn a product demo into short-form ad content
- Common mistakes and how to avoid them
- Tools worth knowing about
- The simple recommendation
Live demo vs. recorded demo: which one you need
There are two ways to demo a product. Live means you are showing it in real time, usually on a sales call or webinar. Recorded means you film it once, edit it, and the same version gets watched by many people over time.
Both have their place. Live demos work well when the sale is complex, the buyer has specific questions, or building trust in the moment matters more than scale. Recorded demos are better for top-of-funnel content, paid ads, landing pages, and social media, where you need one asset to do the talking for you across thousands of impressions.
For most digital marketers running ads on TikTok, Instagram, or YouTube, the recorded demo is what matters. You are not on a sales call. You are competing with every other video in someone's feed, and you have a few seconds to make them stop scrolling.
That changes how you need to approach the recording.
What to decide before you record anything
The biggest mistake people make is picking up a camera or opening a screen recorder without knowing what they are actually trying to show. The result is a video that covers too much and communicates nothing specific.
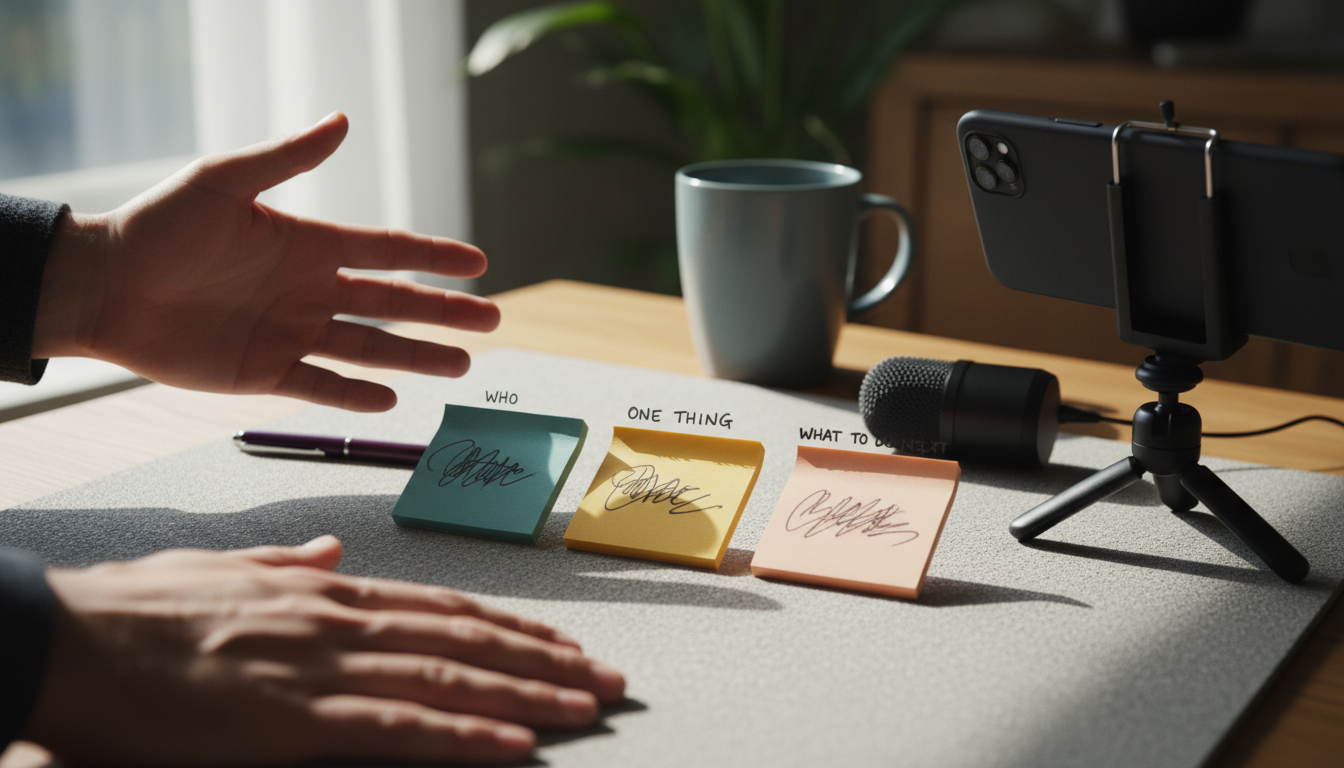
Before recording, answer these three questions clearly.
Who is watching? Not a general audience. A specific person with a specific problem. "A busy parent who wants to track their kid's spending" is more useful than "anyone who wants a finance app." The more specific the viewer in your head, the tighter the demo gets.
What is the one thing they need to understand? Not a feature list. One payoff. "You can create a finished ad in under a minute without opening a video editor" is a payoff. "Our platform has robust editing tools and AI-powered scoring" is not.
What should they do after watching? Click to a landing page, start a free trial, save the video, share it. Know this in advance so the ending points somewhere useful.
Once those three things are clear, the rest of the production becomes much easier.
How to set up your recording environment
Good setup takes ten minutes and saves hours of unusable footage.
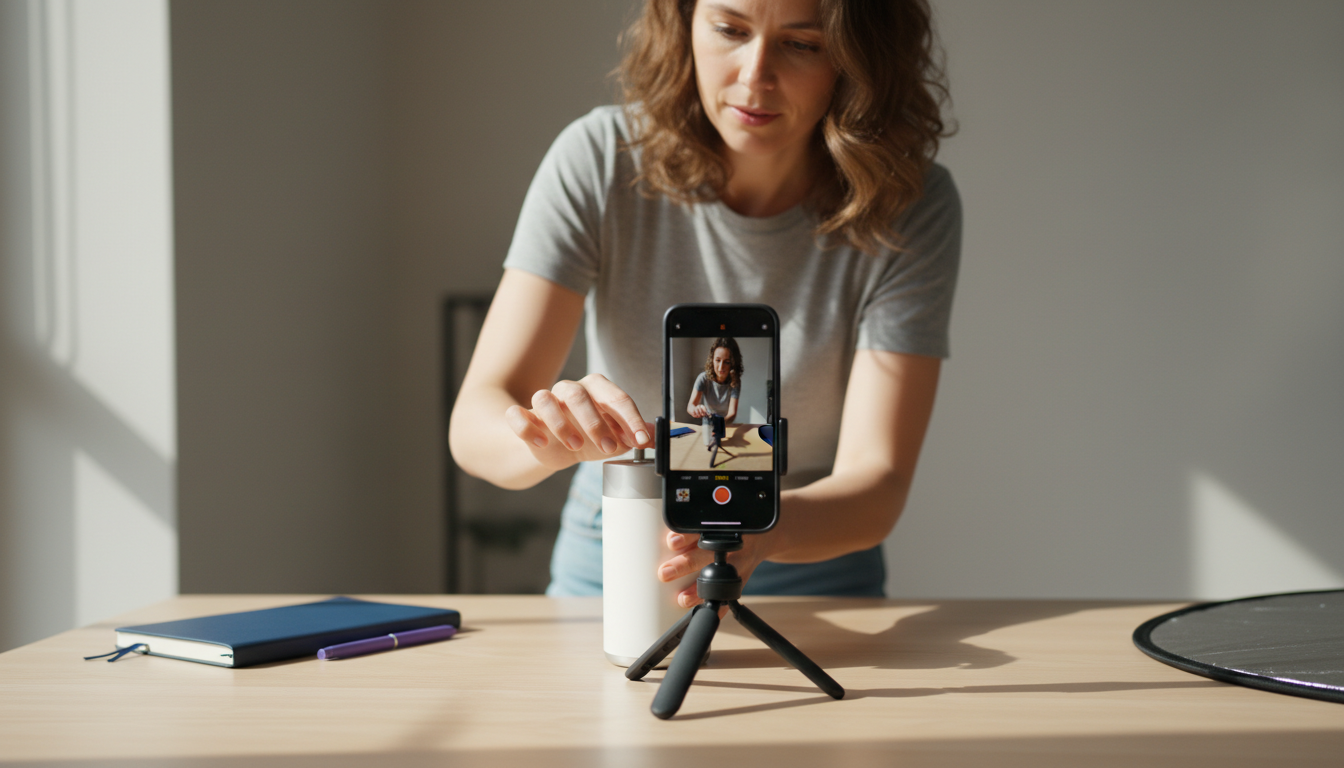
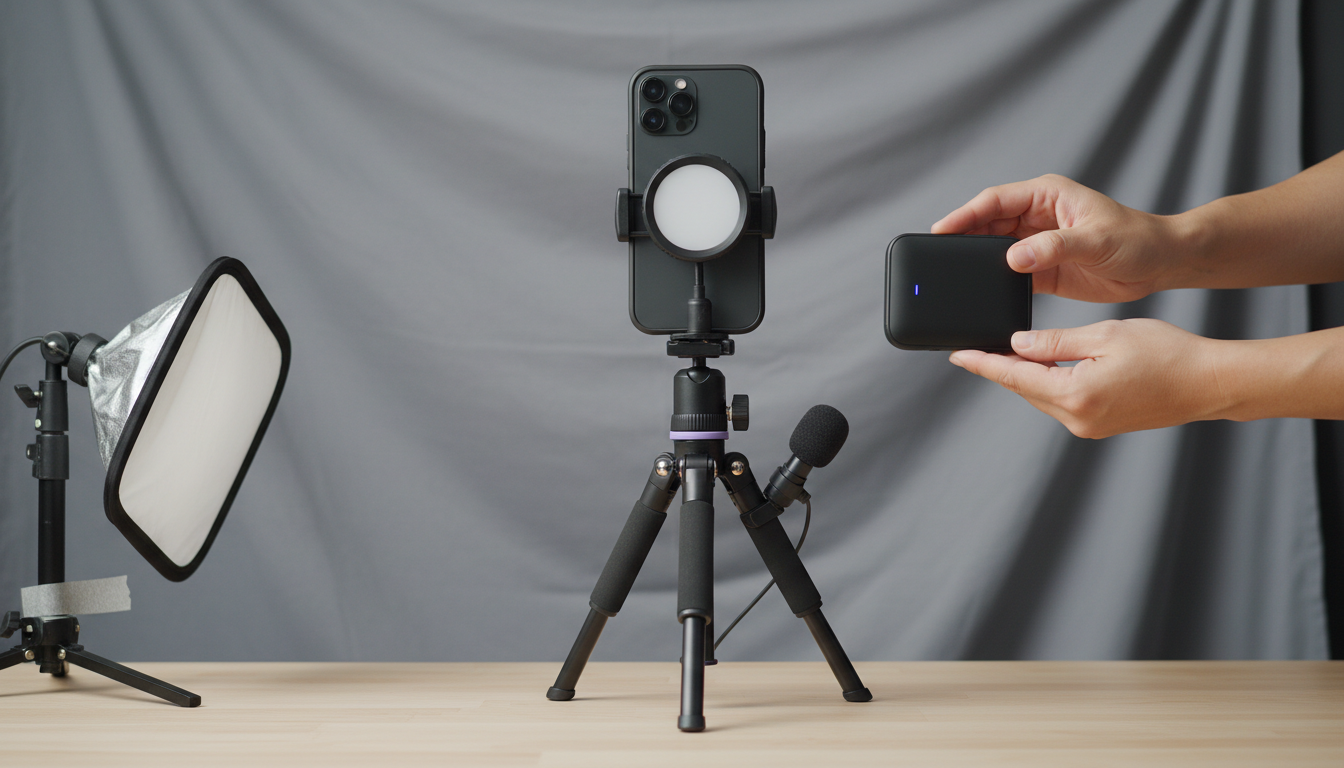
For physical product demos
- Use natural light or a simple ring light. Shadows on the product make it harder to see what is happening.
- Shoot vertically if the footage is going to TikTok, Instagram Reels, or YouTube Shorts. Horizontal footage cropped to vertical almost always looks awkward.
- Use a clean background. A cluttered counter behind the product splits attention.
- Keep the product moving or in use. A static shot of a product sitting on a table is not a demo.
- Use a tripod or prop the phone so the footage is stable.
For software or app demos
- Close every tab and app you do not need. A browser with 40 open tabs visible in the recording looks messy and unprofessional.
- Zoom your screen to the part you are actually showing. Viewers on a phone cannot read small interface text.
- Use a clean browser profile if possible, so no personal bookmarks or saved passwords show up accidentally.
- Record at a resolution your editing software can handle. 1080p is enough for most use cases.
- Silence notifications before you start. A Slack ping mid-demo is distracting.
Audio
If your demo has a voiceover or on-camera talking, audio quality matters more than video quality. A good USB microphone or even a wired headset is usually enough. Record in a quiet room, not near an air conditioner, fan, or open window.
How to record a product demo, step by step
Here is a simple structure that works for most product demos, whether physical or software.
Step 1: Start with the problem, not the product. The first five seconds should make the viewer feel seen. "If you have ever spent an hour editing an ad and still were not happy with it" lands better than "Welcome to a tour of our platform." Name the pain before you show the solution.
Step 2: Show the result before the process. Most demos spend 90% of the time showing inputs (menus, steps, features) and 10% showing outputs (what the viewer actually gets). Flip that ratio. Show the finished output early, then show how to get there.
Step 3: Walk through only the steps that matter. A demo is not a tutorial. Skip the setup screens, the login, and the onboarding. Jump to the moment where the product does the thing it is supposed to do.
Step 4: Use text overlays to anchor key moments. When the important thing happens on screen, a short text overlay reinforces it. "That took 8 seconds" or "No timeline editor needed" tells the viewer what they just saw. Do not assume they will process it without help.
Step 5: End with the payoff and a clear next step. The last five seconds should either repeat the core benefit or show the finished result one more time. Then point somewhere: a URL, a CTA overlay, or a verbal prompt.
For a visual walkthrough of this structure applied to a SaaS product, this video is worth a few minutes:
What makes a demo video worth watching
There is a short list of things that separate a demo someone watches all the way through from one they skip.
Speed
The most common feedback on demo videos is "it feels slow." Every second of hesitation, loading screen, or empty screen time is a second someone can decide to leave. Cut the pauses. Speed up transitions. A demo that shows the same information in 45 seconds will usually outperform one that takes 90 seconds to say the same thing.
Specificity
Vague demos ("this makes your workflow easier") underperform specific ones ("this cuts your ad production time from two hours to under ten minutes"). Specific demos feel credible because they commit to a measurable claim.
Clarity of the payoff
The viewer should know within the first few seconds what they are watching and why it matters to them. If it takes 20 seconds to establish what the product does, most people will not wait.
Fit with the platform
A demo recorded for a sales deck does not automatically work as a TikTok ad. Short-form platforms reward vertical framing, faster pacing, and an opening that earns attention without any context. If the demo is going to run as a paid ad, it needs to be built for that format from the start. The pros and cons of short-form video are worth understanding before deciding how long to make the recording.
How to turn a product demo into short-form ad content
Recording a demo is step one. Turning it into content that runs as a short-form ad is where a lot of marketers get stuck.
The demo footage on its own is rarely enough. Short-form ads that perform well on TikTok and Instagram usually combine a UGC-style opener (a real person reacting, talking, or demonstrating something relatable) with product demo footage. The opener earns attention. The demo delivers proof.
This pairing is called a UGC hook plus demo structure, and it is one of the most consistent formats in performance marketing right now. The TikTok UGC ultimate guide for brands goes deeper on why this format works and how to build a sustainable library of it.
The practical challenge is that pairing UGC clips with demo footage usually means editing, and editing takes time. For marketers running multiple products or testing multiple variations, that adds up fast.
Tools like ClipStitchr handle this specific problem. You upload your product demo once, pair it with UGC openers from your library, and create finished vertical ad variants without opening a timeline editor. The workflow is: choose a UGC hook, pick the demo, preview, and export. It handles the pairing so the time goes into testing more combinations rather than editing each one manually.
If you want to see how this plays out in a real growth context, the fitness app growth case study shows how a team used this approach to scale short-form content without scaling their editing workload.
Scoring clips before you build an ad
One underused step in the demo production process is evaluating whether your demo footage is actually worth using before you commit to building an ad around it. ClipStitchr has a built-in clip scoring tool that looks at hook strength, pacing, clarity, and short-form fit. A score of 84 with a note like "cut the pause before the demo" is more actionable than just watching the clip and guessing.
Scoring saves time because you find out early which demo clips are worth using and which ones need a quick fix first.
Common mistakes and how to avoid them
Showing too many features. A demo that covers eight features usually fails to make any of them memorable. Pick one. Show it well. Let the viewer's curiosity do the rest.
Starting with the company story. Nobody watching a 30-second TikTok ad wants to hear "Founded in 2021, our team set out to solve..." Start with the problem or the result. The company story belongs on the About page.
Recording in landscape when the content is for vertical platforms. This one costs marketers a lot of reach. If the demo is going to run on TikTok, Instagram Reels, or YouTube Shorts, record vertically from the start. Cropping landscape to vertical later almost always cuts off important parts of the screen or face.
Forgetting to show the end result. The whole point of a demo is to show what the viewer gets. If the video spends all its time on menus and steps but never shows the finished output clearly, the viewer has no reason to believe the product delivers.
Using the same demo cut for every channel. A 90-second demo might work on YouTube but will fail as a TikTok ad. A 15-second TikTok cut might leave out too much context for a landing page. Create the full recording once, then cut it differently for each context.
No clear call to action. A demo that ends without telling the viewer what to do next leaves them with nowhere to go. Even a simple text overlay with a URL or "Start free" is enough.
Tools worth knowing about
There is no single best tool for recording a product demo. The right choice depends on whether the demo is physical or software-based, and where it is going.
For screen recording and software demos
Loom is one of the simplest options for recording your screen with a face cam. Good for quick demos that do not need heavy editing.
Tella is designed specifically for product demos, with cleaner output and better control over the background and layout during recording.
Screen Studio produces polished screen recordings with automatic zoom effects that highlight what you are clicking, useful when showing an app or web product.
Zoom is a workable fallback for recording a live demo or a walkthrough. This video covers using Zoom and YouTube Studio for a simple MVP demo:
For physical product demos
A modern smartphone camera is enough for most physical product demos. The constraint is not the camera quality. It is the framing, lighting, and pacing of the demo itself. A well-lit, tightly framed 30-second demo shot on a phone will outperform a poorly paced 90-second demo shot on a DSLR.
For turning demos into short-form ads
Once the demo is recorded, the next step is getting it into a format that runs as an ad. For marketers who pair demos with UGC content, ClipStitchr handles the workflow from upload to finished vertical ad without a traditional editing timeline.
For marketers who want a library of real human UGC to pair with those demos, DansUGC is worth knowing about as a source of creator-made UGC clips built for paid social.
This video from 2026 covers the specific process of making a SaaS demo video and is useful if the product being demoed is software:
A note on live demos vs. recorded demos for paid ads
This comes up enough that it deserves a direct answer.
For paid ads on TikTok, Instagram, and YouTube, live demos almost never make sense. You cannot run a live session as a paid ad. What you can do is record a demo that feels live, meaning it has natural pacing, real screen interactions, and no over-produced polish that signals "this is an ad."
The UGC-style demo is the version of this that performs best on short-form platforms. It looks like someone actually using the product, not a branded video with transitions and music stings. That look earns trust faster in a social feed.
For marketers running iOS or mobile app products specifically, the guide on how to grow an iOS app covers how demo content fits into a broader acquisition strategy.
The format that actually converts on social
Based on what works consistently in short-form paid media, here is the structure that tends to hold attention and drive clicks.
| Segment | Duration | Purpose |
|---|---|---|
| UGC hook | 2 to 5 seconds | Stop the scroll, create curiosity or relatability |
| Problem statement | 3 to 5 seconds | Name the pain the viewer already has |
| Demo of the solution | 8 to 15 seconds | Show the product solving the problem quickly |
| Result or payoff | 3 to 5 seconds | Show or state what the viewer gets |
| Call to action | 2 to 3 seconds | Tell them what to do next |
Total: 18 to 33 seconds for most short-form platforms.
This is why raw demo footage on its own is rarely the final product. The demo is the middle section. It needs an opener that earns attention and an ending that drives action.
The simple recommendation
Here is the plain version.
Record the demo to show one thing clearly. Start with the problem. Show the result early. Cut everything that does not help the viewer understand what they get and why it matters to them. Keep it short.
For physical products, shoot vertically on your phone with decent light and a clean background. For software products, zoom into what matters, close everything else, and show the screen moving, not sitting still.
Once the demo is recorded, the real work is turning it into ad content that runs. That means pairing it with a UGC opener that earns attention before the demo starts. Doing that manually, clip by clip, for every variation, gets slow fast.
ClipStitchr is built specifically for that pairing workflow. You upload the demo once, choose which UGC hooks to test it with, preview each combination, and export finished vertical ad variants without going near a timeline editor. The clip scoring tool tells you which demo footage is worth building around before you spend time on it. Templates save the structure so the next batch starts from somewhere useful instead of from scratch.
If the goal is to record a demo and actually use it as ad content, that is the gap ClipStitchr fills. Getting started takes less time than setting up a screen recorder. The getting started guide walks through the first session clearly.
Good demos are not long. They are clear. Record the thing that matters, cut everything else, and get it in front of the right people.